
Hello World on the W65C265 (65816) from macOS
I have been lucky enough to be healthy so far and have been using lockdown time to get back into electronics and microcontrollers, a hobby that is very compatible with being stuck at home. I have a bunch of Arduino, STM32, ESP8266, and ESP32 boards, but something was calling me more to the retro side of things. My first computer was an Apple //e and I learned to do some 6502 assembly when I was a kid. I later upgraded to an Apple IIgs which was based on the 65816 (which also powered the Super Nintendo). When I was about 13, I saved up and bought myself Orca/M which was an assembler targeting the 65816 on the IIgs. I learned a small amount then before moving on to Orca/C. But I always regretted not learning more. So I wanted something along those lines to play with now.
There are a few options here. There is always emulation. This is a reasonable option, but then I don’t get to play with the electronics of the computer. I could buy a vintage IIgs but they are expensive and take up a bunch of space. Neither of these appealed heavily, though I’m not ruling out a IIgs in the future.
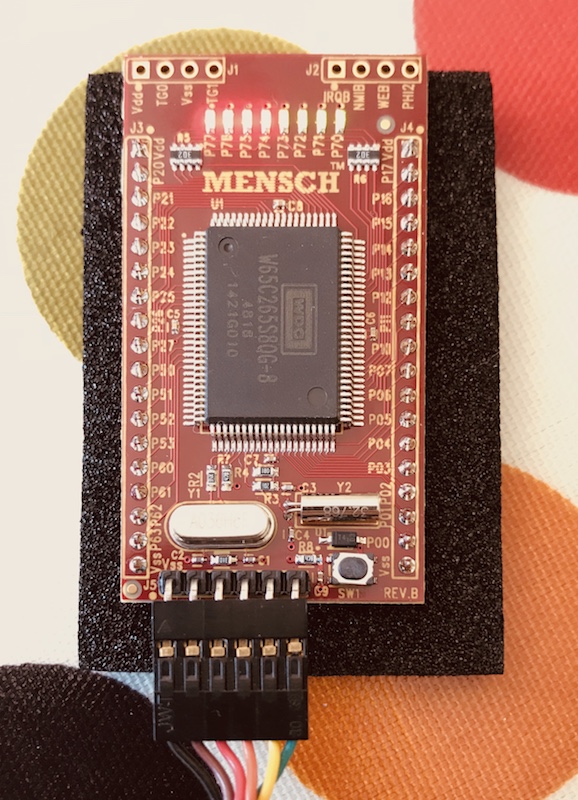
After a little research, I ordered a Mensch single-board computer from Western Design Center, the keepers of the 6502 flame. Bill Mensch was on the original 6502 design team and is the force behind the 65C02 and the 65816. His company still supplies the 65C02, 65C816, and a few other chips. One of those is the W65C265, which is a microcontroller based on the 65816. This is not like the Arduino or STM32 blue pill or other microcontrollers in the sense that it has no on board flash. What it does have is an on board machine code monitor and a library of code in ROM that makes accessing the peripherals pretty easy. It has an interesting mix of peripherals, too, including 8 16bit timers, 4 UARTs, and two tone generators that emit digital sine waves. Also quite unlike many microcontrollers, it is set up to easily add off-board RAM. You do kind of need to if you’re doing much, also, because it has only 520 bytes of RAM, about a quarter of which is occupied by the monitor. The board is pretty inexpensive fun at $18 plus shipping and they happily shipped it to me in Ireland. You can find one for yourself on the WDC site.
I started looking around and found that there is actually decent tool support for this board even though not a lot of people seem to be playing with it or documenting it recently. The chip has been around since the early 90’s, though, and the programming manuals for the 65816 and 65C02 all apply so there is a lot of documentation to start from. WDC supplies tools (compilers, assemblers) for the chip but I was unable to get the download link to work from email on their site. I have notified them. In the meantime I started looking for alternatives, and it turns out there are a few good options. I’ll document the route I chose here to get my first program working.
Getting Started
I found a series of blog posts by Mike Kohn talking about getting started with the board. I ended up following along with what he did to make things work. There were a few bumps along the way to get it running on macOS.
First, to get code onto the board you need to be able to upload to the board over serial. Some microcontoller prototyping boards have USB and some have serial interfaces. The Mensch is in the second category. I have had an FTDI cable for a long time so I just hooked that up and got going. If you don’t have one, you’ll want to pick up one of the many options available. Here’s a Sparkfun example an Adafruit example or one from Banggood.
Note that the ground pin in on the left when facing the board, so the FTDI cable goes on upside down. See the photo at the top of this post.
Next, we need a way to get things to the board. A gentleman named Joe Davisson wrote a tool called EasySXB that makes it easy to load code into the Mensch. I was not able to find available binaries for macOS, however. So I ended up pulling the source and then having to patch and upgrade dependencies to get it to compile under clang on macOS. I have opened a PR to get the changes upstreamed, but in the meantime, macOS High Sierra and newer binaries are available on my fork.
A good “Getting Started”
page on the WDC
site walks you through using this to upload code, so I won’t repeat that here.
It works the same on macOS as on Windows once you have the native binaries.
Note that when starting EasySXB on the command line, you can supply the port
with the --port option which makes it ever so much easier to use since the
tool doesn’t support point-and-click to find the serial port. In my case I ran
it with:
$ ./easysxb --port /dev/cu.usbserial-FTDOMLSO
Once the UI starts you can use the menus to connect.
Running Some Code
Now we need to write some code (or grab it from somewhere) and assemble it. I
started with the hello world blinking LED program from Mike’s post. He and Joe
Davisson maintain an assembler that can target the 65816 called naken_asm. I
initially tried to use the acme assembler but it uses different syntax than
Mike’s code so I took the easy wrote and used
naken_asm. It compiles cleanly on
macOS and was ready to use in a few seconds.
The code from Mike Kohn’s
post
doesn’t quite run out of the box on the Mensch. He has been using external
memory on his board and therefore the base address in the code is above that
available in the base Mensch like I have. I read through the datasheet for the
W65C265 and
found the cleanest contiguous block of memory available and modified the program
to load itself there rather than 0x1000. Line 5 now reads:
.org 0x00B6
This is easily assembled with a single command:
$ naken_asm -h led_blink_65c816.asm

naken_asm

Authors: Michael Kohn
         Joe Davisson
    CPU: 1802, 4004, 6502, 65C816, 68HC08, 6809, 68000, 8048, 8051, 86000,
         ARM, AVR8, Cell BE, Copper, CP1610, dsPIC, Epiphany, Java, LC-3,
         MIPS, MSP430, PIC14, PIC24, PIC32, Playstation 2 EE, PowerPC,
         Propeller, PSoC M8C, RISC-V, SH-4, STM8, SuperFX, SWEET16,
         THUMB, TMS1000, TMS1100, TMS9900, WebAssembly, Xtensa, Z80
    Web: http://www.mikekohn.net/
  Email: mike@mikekohn.net
Version: April 25, 2020

 Input file: led_blink_65c816.asm
Output file: out.hex

Pass 1...
Pass 2...

Program Info:
Include Paths: .
               /usr/local/share/naken_asm/include
               include
 Instructions: 29
   Code Bytes: 64
   Data Bytes: 0
  Low Address: 00b6 (182)
 High Address: 00f5 (245)
This generates an Intel hex format output that is suitable for upload to the Mensch board.
We can now use the menu in EasySXB to upload the program to the board. If the
board is not responsive, you may need to hit the reset button before trying
again. You can validate that things are working by loading the registers from
the monitor with the Get button. Once you’ve successfully uploaded the code,
you can enter 0x00B6 into to the Address: field and hit JML (jump long).
You should see the LED on P72 begin to blink!
This program really is the most basic thing you could do. I took a little time and enhanced it to manage the PCS7 (chip select) register and the control register to get all 8 of the LEDs flashing in groups of 4, and two external LEDs flashing as well. I added some defines from the datasheet to make it a lot clearer what we’re doing here and to prevent having to remember all the memory addresses.
It took a little bit to figure out that I needed to set the PCS7 register up properly to get all the LEDs working. The datasheet is very complete, however, and with a little head scratching I got it working. This is the first board I’ve ever had with a monitor built in and I found it incredibly helpful here for debugging the program. I was able to manipulate registers by hand in the monitor until I understood all the necessary settings to do what I needed. Very handy!
You can find my improved Hello World in this repo.
Note that if you hook external LEDs, they should be on Port 0 and for best effect you should choose any 2 pins next to each other.
Wrap Up
Hello world is not the most exciting thing in the world, but to get there you have to get the whole toolset working. Now that we have that, we can start to explore more things with the baord. It took the better part of a day for me to make all this work on my MacBook Pro. Hopefully this post saves another retro enthusiast some time.
I’ve got some Cypress SRAM chips now and I’m looking forward to hooking them up to this board.